CLICK HERE FOR BLOGGER TEMPLATES AND MYSPACE LAYOUTS »
Showing posts with label The Closet. Show all posts

Monday, June 6, 2011

Done at last!!!

I decided I couldn't live without a copy of "Wind Swept" for myself. So I took my little baby to my wonderful casters. We all thought it would be done at the end of the week, but it took almost a month. Turns out, it was really hard to mold and cast because it's so delicate.

I added all the bezel cups. Funny how simple that sentence is, when soldering on all the bezel cups really put my soldering skills to the test. I soldered on 8 fine silver bezel cups ranging from 4mm to 6mm. Then I custom made and added 2 7mm cups for the pretty Peridots. All in all 10 bezel cups for 10 little gems.

Then I added a multi color liver of sulfur patina.
Sanded it back a little to reveal more of the silver.

And began to set the stones, then I set stones, and finally I set more stones. There are Peridot, Blue Adventurine, Green Adventurine, Moon Stones, Rose Quartz, Amethyst, and a lovely little opal. All in all 10 precious gems are sprinkled around this crown.


Now I just have to make one for me. This one is for a wonderfully patient person who has been waiting for me for, about a year. Thank goodness it turned out so cute. I hope she finds it worth the wait.

There are a couple more pictures of the crown on my flickr site. Thanks for sharing this process with me, it's been a lot of fun and very rewarding.

Friday, April 15, 2011

Kitchen Progress 3

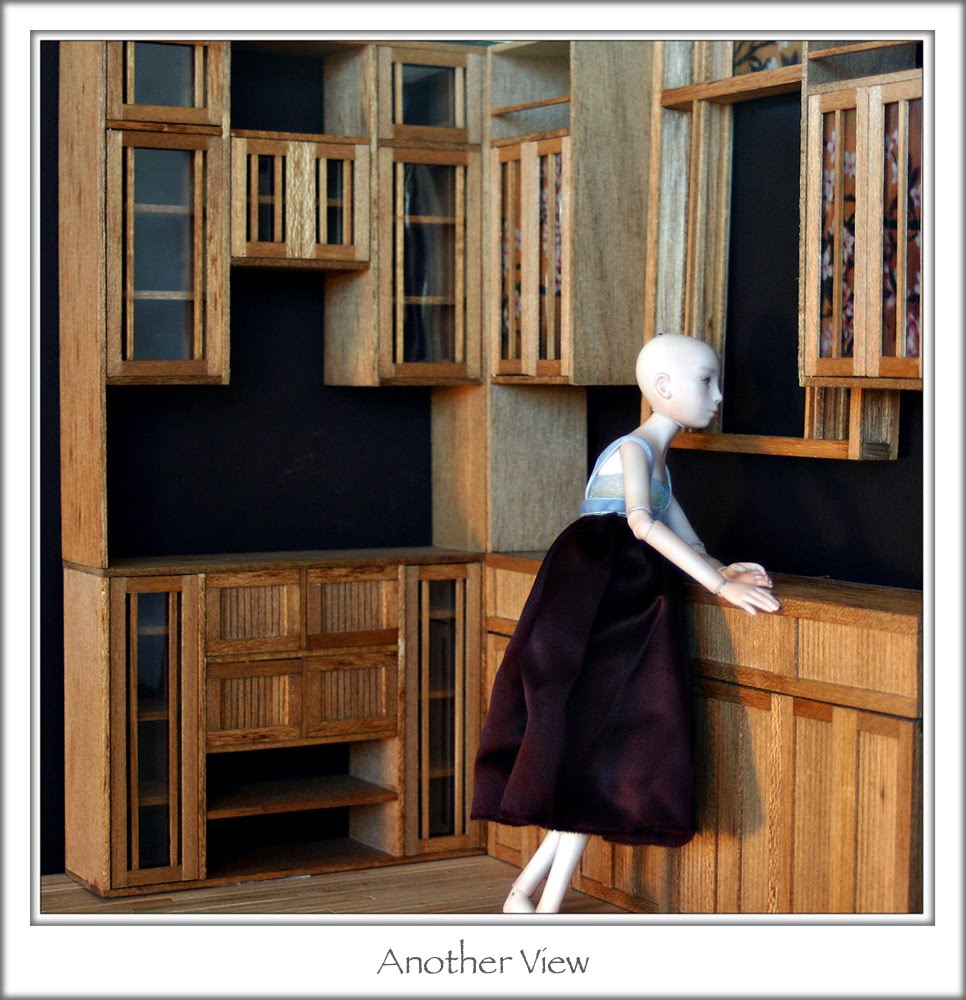
The entire background structure and all the cabinet units for my kitchen are complete. I made the hutch part and the long lower unit removable because I can image using them in other situations. If you want to check out all the progress updates on the kitchen you can go here and here.

What do you think? I'm thrilled!!!
I have more pictures on my flickr site.

I spent hours looking at craftsman color options and I'm really happy with this combo. I think I'm going to try to share all my inspiration images soon. The research was one of the funnest parts of this whole project.

I know the picture in the window isn't to scale, I just clipped it from a magazine, but it gives you an idea of how the window is going to work. I also promised to show how all the "glass" could be frosted instead of stained or clear. So fun and versatile, I love it.

The back splash and counter tops are a slate laminate peel and tick tile. I was able to buy one tile at Home Depot for $1.08, how's that for "bang for the buck"?

The "wallpaper" on the hutch section is from a scrapbook sheet. I scanned the sheet and reduced the image so that the scale worked for my kitchen. I think it adds the perfect whimsical element to the kitchen. The kitchen was getting a little too serious for me.

This picture gives you a better idea of how the structure works. I haven't cut the window in this picture, but I think you get the idea.


And I know I shouldn't have favorites, but I just can't help myself. I'm in love with my "knobs" on the cabinets. They are a tiny brad by Making Memories, with a tiny square element, I found in the 1.00 bin at Micheal's, glued on top. I fully opened the brad so they looked a little more substantial. I think they really give the kitchen the Craftsman feeling I'm going for.


And now I can get down to the fun business of decorating this great kitchen. And to get a jump start on the decorating I made these little baskets to go in the shelves, on the hutch, aren't they sweet?


And speaking of sweet, the sweet treats in the picture above the baskets, are from Kelly, aka tencats, they are so real looking, you just want to pop them in your mouth.

Well the sink is ready, it will be an above counter sink, the hardware just needs a repaint and I'll be happy with it. I also have to build the butcher block table I've mentioned before, but that is on hold until I can decide on a leg. So in in the mean time I'm happy to start decorating, Woo Hoo!!

Friday, April 8, 2011

The Queen of Hearts

I was able to spend some time in my studio today and I'm thrilled with the results. I finished the "Queen of Hearts" crown. You can find more info on this crown's progress in this past post.

Here it is, WooHoo!!
This did not come out of the kiln as nicely as "Wind Swept". I had to make some minor repairs, BooHoo. But all these repairs went extremely smoothly. And I'm really happy with how it turned out.

This is how the crown went into the kiln.

And this is how it came out, Whaa!!!
Repairs done, Yippee!!
"Queen of Hearts" has ruby briolettes, Swarovski Crystal briolettes and 2.5mm to 4mm crystals in every red color I could get my hands on. They all work wonderfully together to create as much sparkle as I could have wanted on this crown.


I'm hoping to spend some time working on "Wind Swept" tomorrow. I got my bezel cups and I'm ready to solder, solder, solder.

Monday, April 4, 2011

Kitchen Progress

I find it really funny that I'm making a kitchen. I don't use my real kitchen, but I'm making one, how ironic. Any whoooooo....I've made some real progress on the kitchen, so I wanted to share.

All the cabinets are made.

Almost all the cabinet doors and drawers work. I just couldn't help myself.

The stained glass can be changed out, if and when I get bored, if I want another color scheme, or it can all just be frosted glass. I'll show that option in the next progress shots.

Now all I need to do is pick out wall paper, decide to wainscot or not, make the kick boards for under the cabinets, pick a counter top material, make a counter top, add trim, cut window, attache everything, landscape outside the window, and oh ya, build a butcher block table I can't get out of my head....and the list goes on and on. But I'll get there, one little piece of progress at a time.

Friday, March 18, 2011

First Photo Shoot

Well we had our first photo shoot and these two are my favorites.


There are a few more shots on my flickr site, if you want to see more of the shoot.

I definitely have to get better with the camera now so that I can show you how truly wonderful she really is, these pictures just don't do her justice. But I think I'm going to get a lot of practice sense my head is full of fun ideas of things to make for her. Woo Hoo.

The hat and knit top are handmade by Biscuitbear over at the Enchanted Doll Forum. They are meant to be worn by an Enchanted Doll but I really love how Bohemian she looks in them.

Thursday, March 17, 2011

The wait is over

I'm not going to go into crazy detail because I have about a million pictures to share and I don't want this to be the longest post ever, so I will just say, I ordered a doll from Kelly aka tencats, an amazing artist, and my doll arrive today, Woo Hoo. She actually arrived yesterday but I was working and so they had to come back today. But no matter, she's here now and without further ado

The Box Opening!


I have a muse, and I just love her.

I'm just blown away by her beauty. It was late in the day when she finally got here so the pictures I took in my excitement were not very good. Hopefully I'll do better tomorrow. She is so wonderful I had a very hard time putting her away.

I've been working like a house elf for her arrival and have some fun things to share. So I think this blog is going to get a work out over the next few days and weeks.


Friday, January 28, 2011

Secret Santa vs. Post Office

Santa 1; Post Office 0

These are beautiful gifties I got from a wonderful women in Paris as a Secret Santa exchange on the Enchanted Doll forum. And they truly took my breath away as I opened the package today. They are so delicate and wonderful in person, you really can't see how great they are in the pictures. Now that I have these and some other little treats for my future doll, I have to say, the desire for my doll is inexpressible.


The Victorian collection, as I'm calling it. It's it all just wonderful? Everything is so delicate and perfect. The corset and hat are completely hand made. And of course the little pictures are of her beautiful dolls. She has two porcelain dolls and I believe the only resin doll in circulation.Can you believe this details and beauty? And the pictures are truly not doing them justice. They are both truly amazing, but, and I know one should not have favorites, but oh my goodness this hat. I just can't get over this hat. It's just soooooooooooo.....purrrrrr.
And will you look at these adorable little sushi. It makes me want to eat sushi. They are even cuter in real life. Can you tell I'm completely over whelmed by this gift? It's just so fantastic, I'm so happy. Thank you so much Secret Santa(s) for these amazing gifts they really mean the word to me. I can't wait to put them on my future ED. Just so happy today, thank you. Did I mention how happy this made me today?

Friday, July 23, 2010

Filigree Crown

This is just a quick post to share my new filigree crown. I made it from sterling silver wire and bezel cups. The focal bead is a Blue Lace Agate and the smaller stones are all Moonstones. The dangles are sapphire Swarovski crystals.

I love how delicate and romantic it is and of course I wanted it to feel vintage, which I think it does. This was my first large scale filigree project and I'm really happy with how it turned out.

I've added this crown to my newly re-opened etsy shop. I don't have much in there at the moment, but I really love what I do have in the shop. Thank you for sharing my journey with me.

Tuesday, July 13, 2010

Barter is Better!

I love trades. I love the idea of them, the spirit of them, and I love getting goodies in the mail. I recently made a trade with a fellow Enchanted Doll Forum artisan and I got my wonderful goodies yesterday.

I don't have a doll, but Ms. Bunny was nice enough to join me for a Tea Party.


Aren't these goodies just the most amazing things you have ever seen? I really am thrilled to have these little beauties. I hope she is as happy with the Jewelry I sent. Here's one of the necklaces. Sterling Silver filigree and chain with a 5x7 Rodalite and a 4mm Moon Stone.

Friday, July 9, 2010

To Build a Head Dress: Done

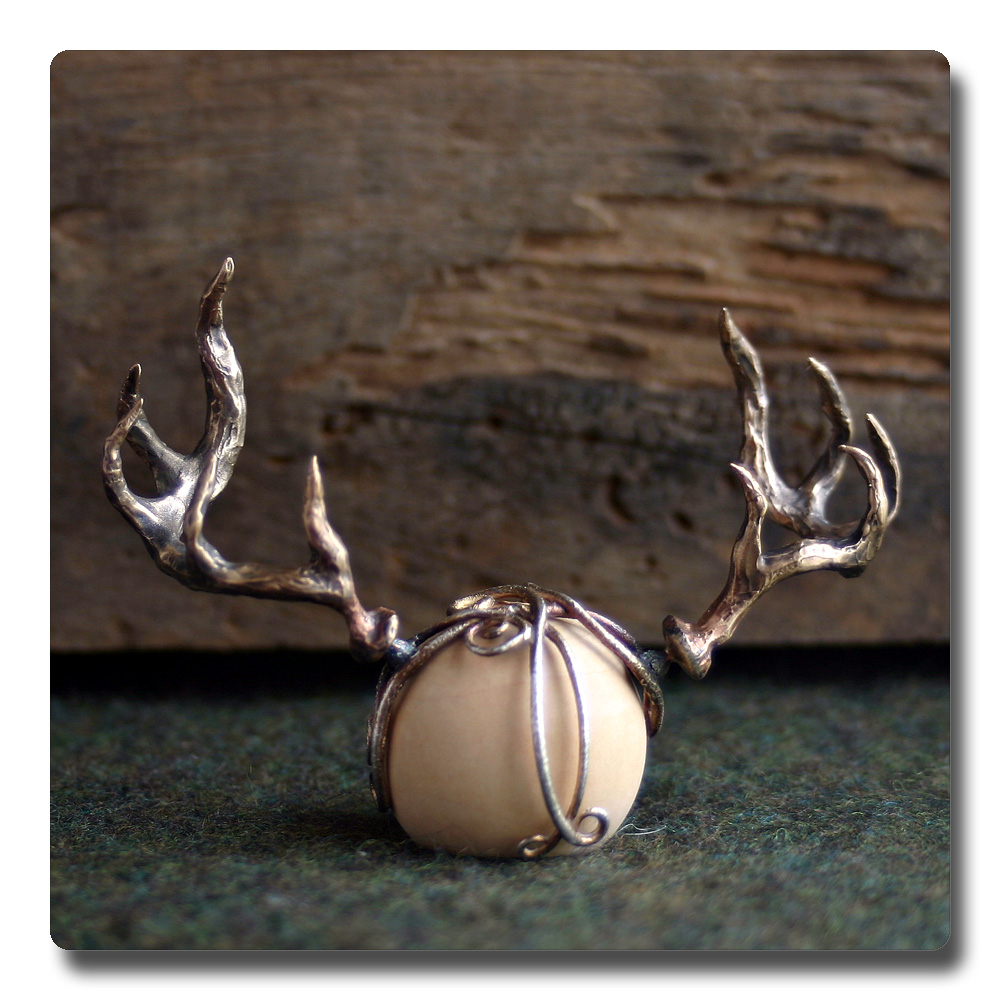
I'm so happy with how this set of Warrior Elf Queen Antlers turned out. The person who ordered this pair wanted a wider stance on the antlers and I love love love how they look like this. They seem more "wild" somehow with this wider stance. I find it so interesting to see my work re-interpreted by someone else. It was a joy to work on this project and I hope their new owner is as happy with them as I am.

Tuesday, July 6, 2010

To Build a Head Dress: Part two

So the next little step was to build the Pedicle for the head dress. What's a pedicle you ask? Excellent question. The pedicle is the bony growth that connects the antler to the head bone of the animal. In our case they attach the antlers to the head piece.

They start out as cute unassuming little things. Then they are connected to the head piece and become down right adorable.
The last step is to attach the antlers to the cute little pedicles. And I'll show you the completed antlers hopefully on Friday.

Monday, June 28, 2010

To Build a Head Dress

I just wanted to share a little of the process I use to build the Elf Queen Warrior, head dress. I use Silver Metal Clay and roll out snakes to create the shape. I create this shape flat.
This piece goes into the kiln at 1650 degrees Fahrenheit for 2 hours. When it comes out I carefully bend it into the head shape. And hammer a bit to work harden it.
Next I'll show you how I add the horns.