CLICK HERE FOR BLOGGER TEMPLATES AND MYSPACE LAYOUTS »

Friday, January 28, 2011

Secret Santa vs. Post Office

Santa 1; Post Office 0

These are beautiful gifties I got from a wonderful women in Paris as a Secret Santa exchange on the Enchanted Doll forum. And they truly took my breath away as I opened the package today. They are so delicate and wonderful in person, you really can't see how great they are in the pictures. Now that I have these and some other little treats for my future doll, I have to say, the desire for my doll is inexpressible.


The Victorian collection, as I'm calling it. It's it all just wonderful? Everything is so delicate and perfect. The corset and hat are completely hand made. And of course the little pictures are of her beautiful dolls. She has two porcelain dolls and I believe the only resin doll in circulation.Can you believe this details and beauty? And the pictures are truly not doing them justice. They are both truly amazing, but, and I know one should not have favorites, but oh my goodness this hat. I just can't get over this hat. It's just soooooooooooo.....purrrrrr.
And will you look at these adorable little sushi. It makes me want to eat sushi. They are even cuter in real life. Can you tell I'm completely over whelmed by this gift? It's just so fantastic, I'm so happy. Thank you so much Secret Santa(s) for these amazing gifts they really mean the word to me. I can't wait to put them on my future ED. Just so happy today, thank you. Did I mention how happy this made me today?

Wednesday, November 17, 2010

Happy Birthday to Me

Sorry I've been away but life, liberty, and the pursuit of happiness have been crazy lately.....But I'm back and happy to share my birthday gift, from me to me, with tons of help from my wonderful friends.


The wonderful texture is a, one of a kind, collaboration between myself and my friend and fellow artist dona D. It was worked in the computer and "printed out" with a cool new toy of Michelle R's, which I wont talk about here because she is going to do a demo for our Metal Clay guild this year and I don't want to steal any of her thunder, but I will say, this toy is super duper cool.

Michelle gave me the piece of copper, how super nice was that, and we ran it thru her rolling mill with the the "print out" of the design. The stone in the center is chrysocolla and malachite. It's from Cabs by Mitch, my favorite online cab maker. I've had the stone forever and I'm so happy to have finally used it. I had to use both my torches to attache the stones bezel cup to the copper bracelet, wow was that fun. The little round guy is an amazonite. I love the way the blue and the copper look together, they just pop pop pop.

I couldn't be happier with how it turned out and I may never take it off.

Friday, July 23, 2010

Filigree Crown

This is just a quick post to share my new filigree crown. I made it from sterling silver wire and bezel cups. The focal bead is a Blue Lace Agate and the smaller stones are all Moonstones. The dangles are sapphire Swarovski crystals.

I love how delicate and romantic it is and of course I wanted it to feel vintage, which I think it does. This was my first large scale filigree project and I'm really happy with how it turned out.

I've added this crown to my newly re-opened etsy shop. I don't have much in there at the moment, but I really love what I do have in the shop. Thank you for sharing my journey with me.

Tuesday, July 13, 2010

Barter is Better!

I love trades. I love the idea of them, the spirit of them, and I love getting goodies in the mail. I recently made a trade with a fellow Enchanted Doll Forum artisan and I got my wonderful goodies yesterday.

I don't have a doll, but Ms. Bunny was nice enough to join me for a Tea Party.


Aren't these goodies just the most amazing things you have ever seen? I really am thrilled to have these little beauties. I hope she is as happy with the Jewelry I sent. Here's one of the necklaces. Sterling Silver filigree and chain with a 5x7 Rodalite and a 4mm Moon Stone.

Friday, July 9, 2010

To Build a Head Dress: Done

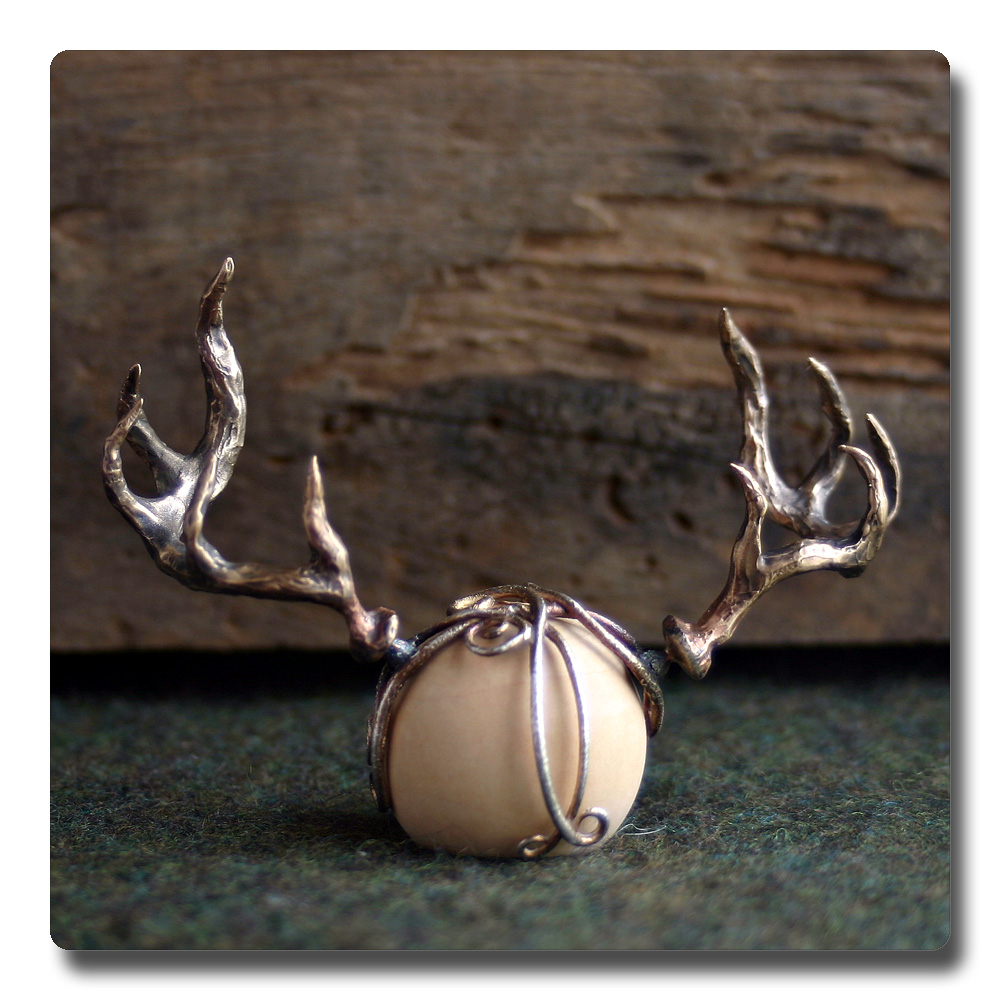
I'm so happy with how this set of Warrior Elf Queen Antlers turned out. The person who ordered this pair wanted a wider stance on the antlers and I love love love how they look like this. They seem more "wild" somehow with this wider stance. I find it so interesting to see my work re-interpreted by someone else. It was a joy to work on this project and I hope their new owner is as happy with them as I am.

Tuesday, July 6, 2010

To Build a Head Dress: Part two

So the next little step was to build the Pedicle for the head dress. What's a pedicle you ask? Excellent question. The pedicle is the bony growth that connects the antler to the head bone of the animal. In our case they attach the antlers to the head piece.

They start out as cute unassuming little things. Then they are connected to the head piece and become down right adorable.
The last step is to attach the antlers to the cute little pedicles. And I'll show you the completed antlers hopefully on Friday.

Monday, June 28, 2010

To Build a Head Dress

I just wanted to share a little of the process I use to build the Elf Queen Warrior, head dress. I use Silver Metal Clay and roll out snakes to create the shape. I create this shape flat.
This piece goes into the kiln at 1650 degrees Fahrenheit for 2 hours. When it comes out I carefully bend it into the head shape. And hammer a bit to work harden it.
Next I'll show you how I add the horns.

Friday, June 25, 2010

Marie's Shoes: little change

I've sent off my first pair of Marie's Shoes. And in getting them ready to go I discovered a little design flaw. The shoes wouldn't stay on the "feet" unless they were touching the ground. This really would have limited the posing that could have been used for the shoes. So I did a little redesign and added a strap across the back of the shoe. I really love how it looks.
The strap is satin with Freshwater pearl embellishment and button closure. I think it looks really cute and period accurate to boot.
I'm sure that if I had a doll I would have caught this problem a long time ago. But because I've never "played" with my shoes I didn't bump into this issue until I was photographing the shoes with the "feet" in them. So all I can say is; I obviously need a doll...Right?

Friday, June 18, 2010

Goes to Show, You Never Know

I love silver. Not as an alternative fine metal, but for itself, I love silver. So when I design I always gravitate towards silver. I made my original Elf Queen Antlers in, what else, silver. And I love them. But... someone ordered a set of antlers in bronze and when I got them from the casters I was shocked to find that I am torn between my beautiful silver pair and these new bronze ones.
The bronze is so beautiful. They look so natural and timeless. I really didn't think I would be so blown away, but I am. And it just goes to show you, you have to be open to new materials and techniques as an artist, or you could be missing out.

I'm actually a lot farther along on the bronze antler headpiece, but I wanted to share the pleasant shock and awe I experienced working with bronze. I'll share more pictures soon.

Wednesday, June 16, 2010

So Very Anthropologie

As you know I have a love, bordering on obsession, of Anthropologie. I refer to all Anthropologie stores as the "Mother Ship" that's how obsessed I am. That said, the story can begin...My honey (I mean very manly man) found a fire engine red dresser outside our house a few nights ago, brought it in the garage, and set to work. Finally he called me into the garage to ask what I thought and I was blown away.

How Anthropologie is this dresser?
We went to the 3rd Street Promenade "Mother Ship" and got two amazing knobs for it. Can you guess which ones they are? The rest of the knobs we got at Home Depot at a much more down to earth price.
I still smile every time I look at it. It's so wonderfully urban shabby.

Monday, June 14, 2010

Surprises From Across the Sea!

I got home this afternoon to the most exquisite surprise. A rather large box from Paris on my doorstep. What could it be? Well it was a box full of the loveliest Enchanted Doll Gifties I have ever seen, from Biscuitbear. This was a wonderful surprise to come home to, it's made my day. Thank you so much.

I've read my beautiful book three times.
I've decided my little acrylic Enchanted dolls are going on my tree this holiday season.
And I'm dreaming of ways to use my lovely Laduree box.

The only problem is, now I want a macaroon but I gave up sugar seven years ago, so no macaroon for me.

Friday, May 7, 2010

Elf Queen: Antler's Final Phase

The Elf Queen Warrior Antlers are done and I couldn't be happier with them. They have taken about twice as long as I thought they would, but it's like they say "Good things come to those who wait."

They turned out beautiful and even better than I imagined.

The antler's are sterling silver and the head piece is fine silver. My initial hope was that the antlers could be removable but their weight made that impossible. A patina has been applied to help highlight the details in the carving. Thank you for your patients and I hope you have enjoyed the journey of this piece as much as I have.

Wednesday, April 21, 2010

Elf Queen: Phase II

My plan for the Warrior Elf Queen antler headdress (seen here and here) was to take the original models to a caster and have them cast in sterling silver. Well...do to some unexpected costs, ie: the molds were wicked expensive, I decided that I'd have to do the whole project myself. At first I was worried about this, but I can say now that I'm really happy I did. I learned a lot about the mechanics of casting and this new information will help my design work in the future. So definitely a lemonade moment here.

Anyway... the next step in the process then became making molds of the antlers for lost wax casting.

Here are my babies in the mold frames and getting ready to be covered in two part, pepto-bismol pink, silicone.Actually the pink brick in the pictures holds one of the antlers already. They had to be molded in two separate molds because of their size.

And here's how they came out.
Amazing right? They are so cool. There was a lot of clean-up at this stage but because they are wax it wasn't too hard. I was also able to make some fun modifications to the horns at the same time. The waxes have the same wonderful texture that I was so happy with in the originals and obviously the shape is the same. So I really couldn't be happier.

This week I will be able to make my plaster investment, next week I will pour my first vacuum cast ever, and then I'll have sterling silver antlers. I hope. Cross your fingers for me and check back next week if you want to see how things went.

Tuesday, April 6, 2010

Marie's Shoes

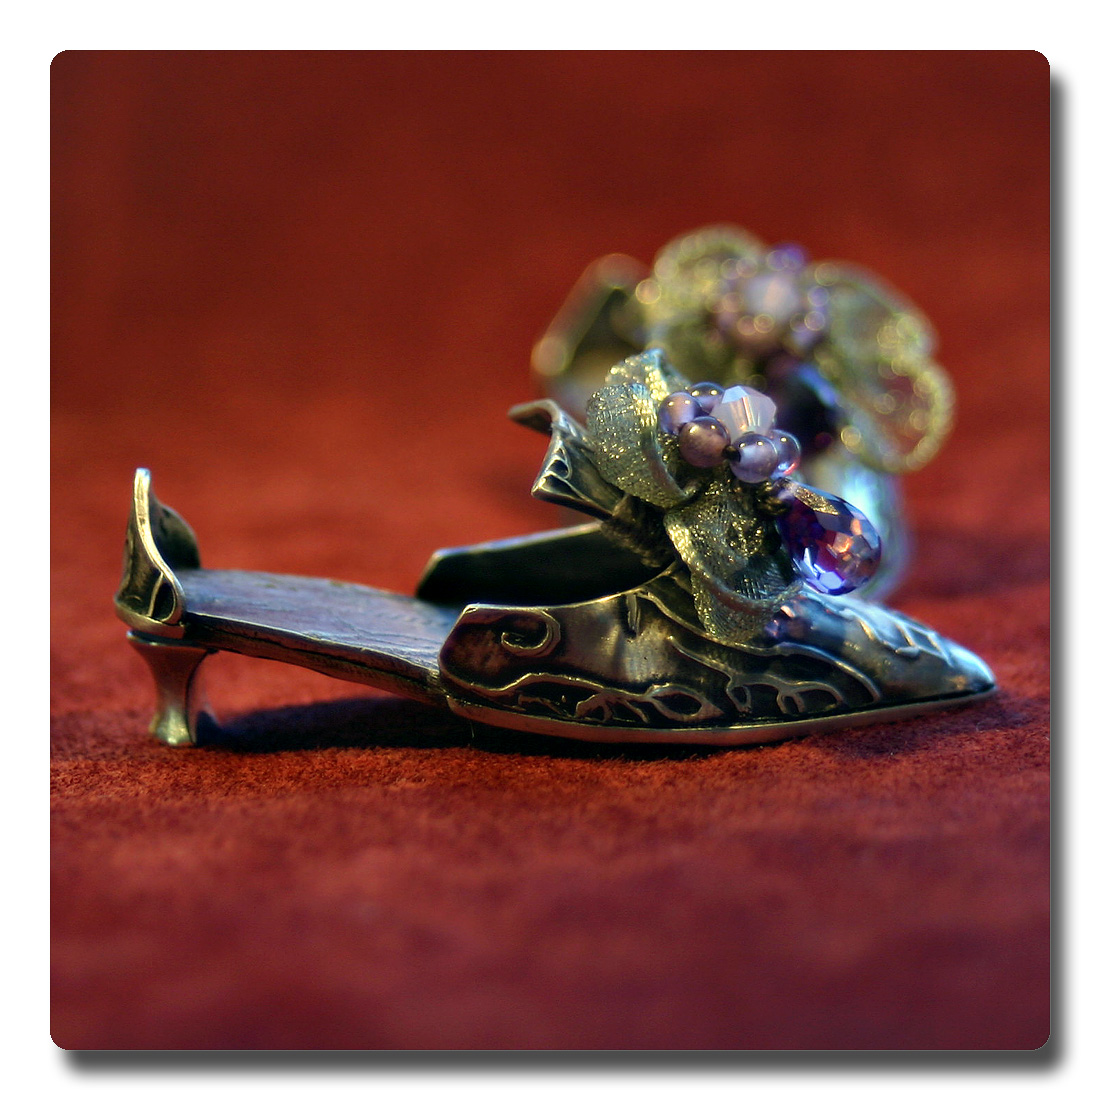
I knew that making shoes was going to be hard. Let me rephrase that, I thought, I knew making shoes was going to be hard. But really I had no clue how difficult this project was going to be. But in the end it was so rewarding. They turned out just as I envisioned them.
I love construction and engineering and it's a good thing because this project was all about construction and engineering. I wanted every part of this shoe to be special. So I tried to add as many one of a kind details as I could pack into these small shoes. The exterior texture has the feel of a vintage textile, which is exactly what I wanted. I love it. I also gave the sole of the shoes a cute little bird detail. Is it possible to have to many details in a Marie Antoinette shoe? I didn't think so.
And I'm in love with the heels. They were difficult to get right, but I'm glad I redesigned them a couple times and never compromised, because I really love the way they turned out.
The decorative trim is a ribbon flower I found in a fantastic embroidery book, an amethyst and opalized Swarovski crystal, and an amethyst briolette. I'm also designing a little Fleur de lis dangle that I'm really excited about.

I'm so happy with how these little shoes turned out. And if the crown and necklace turn out half as good as these little beauties, this Marie Antoinette set is going to exceed my wildest exceptions.

Monday, March 22, 2010

Wow it worked!

I'm so excited to show how the antlers have progressed. They look exactly like they looked in my head. That doesn't happen often, so I'm over the moon with joy.


Front View
Side ViewBack View

It's hard to see in the pictures but the texture of the antlers is really nice, all rough and organic feeling. I know I have some more work to do when I get the wax castings back but I'm just so happy with how they are coming along. I'll keep you posted.

And if you are asking yourself how are these antler going to stay on the doll's head? This is a question I have grappled with also. In the sketches you see that one drawing shows a head band with what appears to be the antlers broken off. That is going to be a structural head band that the antlers attach and unattach to. Cool ha! Here's my first run at the head band, in copper.


I like the shape so I'm going to move onto building it in silver. For all kinds of reasons the copper snapped when I tried to bend it to fit on the head model, but that was all user error, so I feel confident to move onto silver.

And if that's not enough, I was busy all weekend at an amazing jewelry workshop with a fabulous teacher. I'll tell you all about it later this week. I made the funnest "Alice in Wonderland-ish" pendant. So stop back later in the the week.